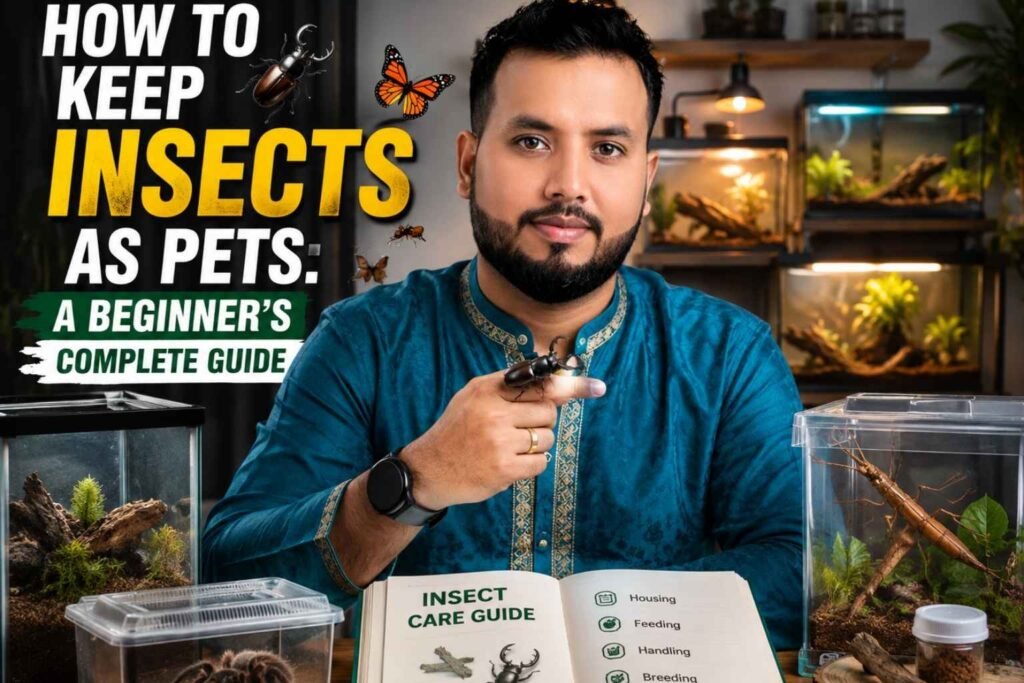
I used to think bugs were just pests until I learned how to keep insects as pets right in my own room. It completely changed my view of these tiny creatures. After years of raising beetles and sticks, I promise they make great, low-stress friends. Let me share how to pick your first bug and start this fun hobby today.
At a Glance
- Insects are low-cost, low-noise, and low-space pets that reward patient observers with genuinely fascinating behavior.
- Madagascar hissing cockroaches and stick insects are the best starting point for most beginners – both tolerate handling and forgive early mistakes.
- The two things that kill most beginner colonies are wrong humidity and wrong substrate depth – both are easy to fix once you know what to look for.
- A digital hygrometer/thermometer combo is the single most important tool you will buy – do not skip it.
- Use the 5-day observation rule before adjusting anything in a new enclosure: watch first, change second.
Why Insects Are Worth Keeping – The Case for Invertebrate Pets
Most people come to insect keeping sideways. I did. I was 14, broke, and living in a flat with a strict no-pets clause. My neighbor kept a colony of Madagascar hissing cockroaches for his biology classroom, and he let me take home a starter group of six. Fifteen years later, I have maintained over 30 species across five genera, run educational display tanks at two schools, and watched more molts than I can count.
The case for insects over traditional pets is simple.
A single Madagascar hissing cockroach costs between £2 and £5 to buy and less than £1 per month to feed (The Bug Club UK, 2024). A starter enclosure runs £15 to £30. Compare that to the annual cost of keeping a cat – averaging £1,000 to £1,500 per year in the UK (PDSA Animal Wellbeing Report, 2023) – and you understand why insect keeping has grown 40% among UK hobbyists since 2020 (Invertebrates Magazine, 2023).
They take up almost no space. A 10-liter plastic tub holds a colony of 50 hissers comfortably. An ant colony lives in a formicarium the size of a paperback book. A stick insect needs a mesh enclosure roughly 30cm tall. You can keep five or six species on one shelf.
They make no noise. They produce no dander. They do not need walking. They will not wake your housemates at 3am.
What they do offer is genuine behavioral complexity. Watch a mantis hunt. Watch worker ants repair a tunnel after you disturb their substrate. Watch a stick insect sway to mimic a branch in wind. That is not nothing. Per entomologist May Berenbaum, insects show problem-solving behaviors that continue to surprise researchers even under controlled lab conditions (Berenbaum, Bugs in the System, 2024 edition).
Beginner Species Reference Table
| Species | Difficulty | Lifespan | Space Needed | Care Intensity |
|---|---|---|---|---|
| Madagascar hissing cockroach | Easiest | 2-3 years | 10L tub minimum | Low – weekly clean, daily food check |
| Indian stick insect (Carausius morosus) | Easiest | 12-18 months | 30cm tall mesh cage | Low – mist daily, change leaves 2x/week |
| Mealworm beetle (Tenebrio molitor) | Easiest | 8-12 weeks (adult) | 5L tub | Very low – mostly self-managing |
| Praying mantis | Moderate | 10-14 months | 20cm tall mesh cage | Medium – live prey only, no humidity errors |
| Ant colony (Lasius niger) | Moderate | Queen: 10-15 years | Small formicarium + foraging area | Medium – stable temperature critical |
| Isopods (Armadillidium spp.) | Easiest | 2-3 years | 5L tub | Very low – moisture gradient, that’s it |
| Hornworm (Manduca sexta) | Easiest | 6-8 weeks larva | Small plastic container | Low – but short lifespan, mainly for kids |
| Flower mantis (Pseudocreobotra wahlbergii) | Rewarding challenge | 10-12 months | 20cm tall mesh cage | High – precise humidity, live prey variety |
What Is Actually Happening Inside an Insect Enclosure
Understanding what your insects need starts with understanding the four things they are managing at all times: temperature, humidity, substrate depth, and airflow.
Get all four right, and your insects eat well, molt cleanly, and breed. Get one wrong, and you will spend weeks wondering why your colony is declining.
Temperature: Gradients Matter More Than Single Numbers
Your insect does not live at a single temperature. It moves around its enclosure to find the zone it needs for a specific behavior. A basking mantis will move toward a warm spot before hunting. A stick insect will move to a cooler area during a molt.
That means your job is to create a temperature gradient, not a single uniform temperature.
For most beginner species, the warm end of the enclosure should sit between 26°C and 30°C. The cool end should stay between 20°C and 23°C. A heat mat placed under one-third of the enclosure base achieves this without much effort. Never place the heat mat under the center – that removes the gradient.
Per Keeping Insects by Harmen Faber (2022), most husbandry failures in beginner setups trace back to uniform temperature – usually a single heat mat under the whole floor of the tub.
Humidity: The Number Kills Colonies More Than Any Other Factor
Humidity errors are the leading cause of death in beginner insect collections. Too dry, and stick insects fail molts. Too wet, and roach colonies develop bacterial infections.
Every species has a target humidity range. Most popular beginner species fall into one of three bands:
- Dry (30-40% RH): mealworm beetles, many desert-origin mantis species.
- Moderate (50-65% RH): Madagascar hissing cockroaches, most stick insects.
- Humid (70-80% RH): tropical mantis species, forest isopods.
You cannot guess these numbers by feel. You need a digital hygrometer (a device that measures relative humidity). A combined hygrometer/thermometer unit costs around £8 to £15 and is the best single investment you will make in this hobby.
Substrate Depth: The Mistake Everyone Makes First
Substrate is the material that lines the floor of your enclosure. For most burrowing or ground-dwelling species, substrate depth directly affects your insect’s ability to complete a molt, lay eggs, and regulate its own microclimate.
The standard beginner mistake is adding 1-2cm of substrate and calling it done. That is not enough.
Madagascar hissing cockroaches need at least 5cm. Burrowing species like isopods need 8-10cm so they can establish moisture gradients within the substrate itself – wet at the bottom, dry at the top – which they use to regulate their own hydration.
Use coconut fiber (coir) as a base substrate for most species. It holds moisture without going anaerobic, costs very little, and compresses predictably. For roaches, mix coir 50/50 with dried leaf litter for a more natural environment (Joshua’s Frogs Husbandry Notes, 2023).
Ventilation: The Factor Most Guides Underplay
Poor airflow causes stale, damp air to sit in the enclosure. That promotes mold, bacterial growth, and respiratory stress in your insects.
Every insect enclosure needs cross-ventilation – air moving in on one side and out on the other. The exact method depends on enclosure type (covered in the enclosure section below), but the principle is always the same: still air is a risk, moving air is not.
Why the “It’s Just a Bug” Mindset Gets Beginners in Trouble
I hear this every time I introduce someone new to the hobby. “They’re insects – they’re not exactly going to get stressed, are they?”
Then they lose their first colony. Then they come back with questions.
Insects are not emotionally complex pets. They do not bond with you, and they do not need stimulation in the way a parrot does. But they are far more sensitive to environmental changes than most beginners expect.
A stick insect exposed to humidity below 45% RH during a molt will get stuck. The exoskeleton hardens before the insect can pull itself free. That molt ends in injury or death, and it happens fast.
A praying mantis introduced to an enclosure where temperatures dropped 6°C overnight will refuse to eat. Three refusals in a row are a warning sign that something in the setup is wrong.
Insects do not show stress the way mammals do. They do not cry out or pace or scratch at a door. Their stress signals are behavioral and physical: refusing food, failed molts, clustering at one end of the enclosure, or abnormal postures. If you do not know what normal looks like, you will miss these signals until it is too late.
The 5-Day Observation Rule
Every time I introduce a new species to my collection – or rehome an existing colony to a new enclosure – I follow the same rule: do nothing for five days except watch and record.
No feeding changes. No substrate adjustments. No extra misting. I just observe.
On day one, I note where each insect spends most of its time. On day three, I check the substrate moisture. On day five, I review whether the animals look active and positioned normally for their species.
Those five days give me a baseline. Every adjustment I make after that is against a known starting point, not a guess.
Per the Entomological Society of America’s beginner guidance (ESA Care Sheets, 2023), new keepers who establish a baseline observation period before making husbandry changes see significantly fewer unexplained deaths in the first 90 days than those who adjust instinctively.
Beginner Species Broken Down by Difficulty Tier
Tier 1: Easiest – Good for Kids, Apartment Keepers, and Anyone New
Madagascar hissing cockroaches (Gromphadorhina portentosa) are the standard recommendation for a reason. They tolerate a wide humidity range (50-65% RH), accept a variety of foods, can be handled safely, and breed readily when conditions are even approximately right. They hiss by forcing air through respiratory openings (called spiracles) – not through a mouth – which surprises almost everyone who handles one for the first time.
They are also excellent for educators. A colony of 10 adults can be maintained on fruit and vegetable scraps. They live two to three years, long enough to be a classroom fixture for a full school year.
Indian stick insects (Carausius morosus) are the easiest invert to care for in terms of food. They eat fresh bramble, privet, hawthorn, or ivy – all of which grow wild across most of the UK and large parts of continental Europe. They need daily misting and a mesh cage for airflow, but they tolerate beginner mistakes in temperature and feeding schedule better than almost any other species.
They are a fantastic choice for children for one specific reason: you can watch them molt. The process takes 30 to 90 minutes and is completely safe to observe. It is one of the most genuinely impressive biological events you will ever see in a home setting.
Mealworm beetles (Tenebrio molitor) are the lowest-maintenance entry point in the hobby. You keep them in a plastic tub with dry bran, a small piece of potato or carrot for moisture, and almost nothing else. The full life cycle – larva to pupa to adult beetle – takes around 10 weeks and is easy to observe. They are ideal for schools and for anyone who wants to understand insect biology without a significant time commitment.
Isopods (Armadillidium vulgare or Armadillidium maculatum) have become enormously popular in the last five years, partly because they are easy to keep and partly because the color morphs are genuinely striking. They need a moisture gradient in their substrate, a hide to shelter under, and decaying leaf litter to eat. That’s it. They live two to three years, breed readily, and tolerate handling.
Tier 2: Moderate – For Keepers Who Have Done a Month or Two with an Easier Species
Praying mantis (Sphodromantis lineola for beginners) needs more precision than the Tier 1 species. They eat live food only – crickets, fruit flies, or mealworms depending on their instar (developmental stage). You cannot feed a juvenile mantis the same prey size as an adult, and you must not overfeed. Overfeeding causes the abdomen to swell and can lead to death within days.
They also need to be kept alone. Mantises are cannibalistic. Two in one enclosure is a death sentence for one of them.
With that said, mantises are worth every bit of the extra effort. They track prey. They clean their faces. They look directly at you when you approach the glass. Of all the insects I have kept, mantises have the most visible personality.
Ant colonies (Lasius niger is the standard UK beginner ant) are a different type of challenge. You are not managing one animal – you are managing a superorganism. The colony’s health depends on consistent temperature, a dark nest area separate from the foraging space, and a reliable food supply. Temperature fluctuations above 3-4°C per day cause worker die-off.
The reward is watching colony-level intelligence. Ants repair tunnels, move brood to optimal humidity zones, and solve problems in real time. There is nothing else like it in amateur invertebrate keeping.
Tier 3: Rewarding Challenge – For Keepers with 3+ Months of Experience
Flower mantids (Pseudocreobotra wahlbergii, the spiny flower mantis) need high humidity with excellent ventilation – a balance that is harder to achieve than either extreme. They are also small in their early instars, which means you must provide fruit flies (Drosophila hydei) as prey rather than crickets.
They are spectacular animals. The adult wings display false eye markings that are used to startle predators. They are one of the most photographed mantis species in the world for a reason.
Glass vs. Plastic vs. Mesh Enclosures – What to Use and When
Enclosure choice is not just about aesthetics. It directly affects humidity retention, temperature stability, and ventilation – which in turn affect every aspect of your animal’s health.
Glass Enclosures: Good Visibility, Poor Ventilation Unless Modified
Glass terrariums hold humidity well. That makes them a reasonable choice for tropical or humid species. The problem is ventilation: standard glass tanks often have ventilation only at the top, which means hot air rises out but there is minimal cross-ventilation.
For most insects, you need at least two ventilation points at different heights. A glass tank with mesh on the top lid and a ventilation strip on one lower panel is good. A glass tank with only a mesh lid is often not enough airflow for mantis species.
Glass is also heavy and more expensive than plastic. I use it for display enclosures and for any species where visibility matters to the observer (usually school or public setups). For working colonies, I use plastic.
Plastic Tubs: The Workhorse of the Hobby
Most serious insect keepers house the majority of their collection in plastic storage tubs. They are cheap, light, stackable, and easy to modify.
To add ventilation, use a heated screwdriver or a drill to add holes on opposing sides of the tub – one set low on one side, one set higher on the opposite side. Cover both sets of holes with mesh hot-glued inside the tub. This creates the cross-ventilation that most insects need.
The downside of plastic is condensation management. In humid setups, water droplets collect on the inside walls. That is not automatically a problem, but if the condensation is heavy enough to pool at the bottom of the tub, your substrate is too wet.
Mesh Enclosures: Best for Stick Insects and Most Mantis Species
Mesh cages (usually built around a folding metal frame) are the best choice for any insect that needs high airflow combined with moderate humidity. Stick insects and most mantis species fall into this category.
The drawback is that they lose humidity fast. In a dry home environment, a mesh cage may need misting twice daily in winter when central heating is running. Place a digital hygrometer inside to monitor this, and adjust your misting frequency based on what you read, not what you assume.
Per Reptile Systems’ keeper guides (2023), mesh enclosures lose approximately 15-20% relative humidity per hour in a room maintained at 18°C with central heating running. That is faster than most beginners expect.
Live Plants vs. Artificial Decor – An Honest Assessment
I used live plants in my enclosures for the first three years of keeping. I stopped for practical reasons that took me too long to figure out.
Live plants offer two genuine benefits. First, they help stabilize humidity by releasing moisture through their leaves. Second, for plant-eating species like stick insects, they are a direct food source, which means they serve a dual function.
The problem is mold risk. In a high-humidity enclosure, soil-based plant pots introduce mold vectors that spread to substrate faster than you expect. I lost two stick insect clutches to a mold outbreak that started in a small pot of ivy I had added for enrichment. The ivy looked fine. The substrate did not.
If you want to use live plants, choose species with non-soil growing mediums: epiphytes like air plants (Tillandsia spp.) are a reasonable option in humid setups. Avoid soil-potted plants in enclosed high-humidity environments.
Artificial decor – cork bark, artificial vines, plastic hides – has no mold risk, is easy to clean, and lasts indefinitely. It is the practical choice for most working setups. I use it for all my colonies now and reserve live plants only for photography setups that are cleaned after each session.
How to Use a Digital Hygrometer and Thermometer – The Right Way
A digital hygrometer/thermometer combo is a single device that reads both relative humidity (RH) as a percentage and temperature in Celsius or Fahrenheit. Units with a probe on a cable are better than those without, because the probe can sit inside the enclosure while the display sits outside.
Buy one before you buy your first insect. Seriously. Set it up inside the empty enclosure for 24 hours before adding any animal. That 24-hour reading is your baseline.
Reading Hot and Cold Zones
Place your probe in three positions over three days: warm end of the enclosure (above the heat mat), cool end, and the center. Note all three. You should see a gradient of at least 5-6°C between the warmest and coolest readings. If the gradient is less than 4°C, your heat source is either too powerful (heating the whole enclosure evenly) or in the wrong position.
If the gradient is more than 10°C, your heat source is too concentrated. Add a small piece of cork bark or cardboard over the heat mat to diffuse it slightly.
The Paper Towel Moisture Test
This test tells you whether your substrate is at the right moisture level without you needing to dig into it.
Take a small piece of white paper towel. Press it flat against the substrate surface for 10 seconds. Lift it and check.
If the towel is dry: your surface is dry, which is appropriate for dry-keeping species (mealworms, desert mantis) but likely too dry for stick insects or roaches.
If the towel picks up a light, even dampness: this is correct for moderate-humidity species.
If the towel is visibly wet or heavy: your substrate is too wet. Remove the top layer and allow it to dry out over 24-48 hours before misting again.
Do this test weekly. It takes 30 seconds and tells you more than a visual inspection.
When to Skip the Misting
For dry-keeping species (mealworm beetles, desert mantis species, many arid-region roaches), skip misting entirely. These animals derive water from fresh food – a piece of carrot or apple placed in the enclosure two to three times per week is sufficient.
Misting a dry-keeping species is one of the most common beginner mistakes. It raises humidity into a range that promotes bacterial and fungal growth in the substrate, and it does not help the insect. If you are not sure whether your species is dry or humid-keeping, default to a piece of fresh food as a water source and do not mist until you have confirmed the humidity requirement.
When You Must Never Skip the Misting
For any species in an active molt, do not skip or delay the misting schedule that day. Humidity is what keeps the old exoskeleton pliable during the molt process. If humidity drops below the species minimum during a molt, the exoskeleton can harden before the animal has fully extracted itself.
If a molt has started – you will see the insect clinging upside down, the old cuticle beginning to split at the thorax – mist the walls of the enclosure (not the insect directly) and do not disturb the enclosure until the molt is complete.
Common Beginner Mistakes and How to Fix Them
Molting Interference
This is the single most common mistake I see, and it is almost always made with good intentions. The keeper notices an insect in a strange position, assumes it is stuck or injured, and reaches in to “help.”
Do not touch an insect in mid-molt. The exoskeleton is soft and the animal is completely vulnerable. Any contact can cause deformity or death.
If you see an insect hanging upside down from the mesh roof or the top of a branch, leave it alone. That is normal molting posture for most species. The process takes between 20 minutes (small instars) and 3 hours (large adults). Walk away.
Fix: Mark the date and time when you notice a molt starting. Set a timer for 4 hours. Check back then. If the molt has not completed in 4-5 hours for a larger species, there may be a problem, but even then, consult a species-specific care resource rather than intervening physically.
Overfeeding
Overfeeding creates three problems: uneaten food decays and raises ammonia in the enclosure, decaying food promotes mold, and overfed insects (particularly mantises and some roach species) develop health problems from excess nutrition.
The rule for most insects: food should be gone within 24-48 hours of being offered. If you add 5 crickets to a mantis enclosure and 3 are still alive 48 hours later, you fed too many. Next feeding, offer 2.
Fix: Start conservatively. Feed less than you think you need to, observe for 48 hours, then adjust up if the food is gone within a few hours of being added.
Improper Substrate Depth
A 1-2cm layer of substrate is aesthetically tidy but functionally useless for most species. It dries out too fast, cannot support burrowing behavior, and does not create the moisture gradient that many ground-dwelling species require.
Fix: For Madagascar hissing cockroaches, use a minimum of 5cm. For burrowing isopods, use 8-10cm. For stick insects (which do not burrow), substrate depth matters less, but 3-4cm is the practical minimum for moisture management.
Confusing Normal Behavior with Health Problems
Stick insects sway. That is not a symptom; it is camouflage behavior. Hissers cluster at night; that is not a sign of overcrowding (unless the cluster is forming during the day, which can indicate temperature or stress issues). Mantises refuse food for 3-5 days before a molt; that is normal pre-molt behavior, not illness.
Fix: Before you diagnose a problem, spend 10 minutes reading species-specific behavior descriptions. Most “my insect is acting weird” questions have a behavioral explanation, not a health one.
Wrong Prey Size for Mantis Species
A mantis should be offered prey no larger than its own head width. Offering prey that is too large stresses the mantis and can result in the prey injuring the mantis during the hunt. This is especially common with juvenile mantises (early instars) where beginners try to offer adult crickets.
Fix: For instars 1-3, use fruit flies (Drosophila hydei). For instars 4-6, transition to small crickets or waxworms. For adults, medium crickets or locusts.
My Personal Insect Care Routine
I check my enclosures every morning. The morning check takes under 10 minutes for a collection of 8 to 12 enclosures. Here is exactly what I do.
I walk the row of enclosures from left to right. For each one, I do a quick visual: are the animals positioned normally? Is there any visible mold on the substrate surface? Is there uneaten food from the previous feeding that has started to decay?
For any enclosure with uneaten food that is more than 48 hours old, I remove it with long tweezers. I do not replace it that day. I let the insect fast and re-offer fresh food the following morning.
I mist my humid-keeping species in the morning rather than the evening. Morning misting allows the water to partially evaporate through the day, which prevents the stale, wet-air problem that builds overnight in a sealed enclosure. I mist the walls and any artificial plants, not the insects or the substrate surface directly.
On Sundays, I do a deeper check: I read the weekly hygrometer log (I keep a simple notebook with seven days of readings per enclosure), I check substrate moisture with the paper towel test, and I replenish food and water sources across the board.
Every three months, I do a full substrate change for my roach colonies. I remove all the adults into a temporary holding tub, dispose of the old substrate, clean the tub with a diluted white vinegar solution, allow it to dry fully, add fresh coir, and return the colony. The full process takes about 20 minutes per enclosure.
The key to this routine is that it is consistent, not time-consuming. Fifteen minutes in the morning, a longer session once a week. That is enough to catch problems early.
Sourcing Your First Insects – What to Look For and What to Avoid
Buy from a reputable specialist, not a general pet shop. Insects sold in pet shops as reptile feeders are not the same animals as those sold by hobbyist breeders. Feeder insects are often overcrowded, underfed, and shipped under conditions that cause stress before they reach you.
For UK buyers, The Bug Club UK (bugclub.co.uk) maintains a list of member breeders. For US buyers, the American Tarantula Society classifieds and specialized vendors like Bugs In Cyberspace offer properly sourced invertebrates with husbandry notes (Bugs In Cyberspace, 2024).
When buying a mantis, ask whether it has been sexed and what instar it is. A vendor who cannot tell you the instar is likely not tracking their animals carefully.
Inspect any animal you receive within 24 hours of delivery. A healthy hisser is active at night, responds to touch by hissing, and has smooth, intact antennae. A healthy stick insect holds its body in a rigid, diagonal position. A healthy mantis is alert, holds its forelegs in the classic triangular strike position when approached, and tracks your movement with its head.
If an animal arrives dead or clearly unhealthy, document it with photos and contact the seller immediately. Reputable sellers replace DOA (dead on arrival) animals.
Setting Up Your First Enclosure – A Step-by-Step Process
Step 1: Choose and Prepare the Enclosure
Select an enclosure appropriate for your species (see the Glass vs. Plastic vs. Mesh section above). If using a plastic tub, add ventilation holes before adding any substrate. If using a mesh cage, confirm all panels are secure and there are no gaps larger than 1-2mm for small species.
Clean the enclosure with a diluted white vinegar solution and allow it to dry completely. Do not use any soap or detergent – residue can harm insects.
Step 2: Add Substrate and Set the Temperature Gradient
Add the correct depth of substrate for your species (minimum 5cm for most ground-dwelling invertebrates). Place your heat mat under one-third of the enclosure base.
Allow the empty, substrated enclosure to sit for 24 hours with your hygrometer/thermometer probe inside. Note the temperature and humidity readings at the warm end, center, and cool end.
Step 3: Add Hides and Furniture
Add cork bark pieces, artificial plants, or other furniture before introducing your insect. The animal should have at least one hide that covers it completely – a single piece of curved cork bark flat against the substrate is enough for roaches and isopods.
For stick insects, add a secure anchor point for molting near the top of the enclosure. A horizontal twig or cork bark piece at height works well.
Step 4: Mist to Correct Humidity (Humid Species Only)
For humid-keeping species, mist the walls of the enclosure lightly and allow 30 minutes to stabilize. Check your hygrometer reading. If you are below the target RH, mist again. If you are above, open the mesh or ventilation for 30 minutes before closing.
Step 5: Introduce Your Insect and Begin the 5-Day Observation Period
Place your insect in the enclosure by tipping the transport container gently against the substrate. Do not grab or drop the animal. Allow it to move into the enclosure at its own pace.
Close the enclosure and begin your 5-day observation. Do not add food until day two, so the animal has time to settle without the stimulus of prey. Do not mist on day one unless your hygrometer drops significantly below the target RH.
How to Read Molting Signs Before They Happen
Most species show clear behavioral signals 24 to 72 hours before a molt.
Stick insects stop eating 1-2 days before molting and begin positioning themselves near the top of the enclosure. They will cling to the mesh or a high branch and become almost completely still. Do not mistake this for illness.
Madagascar hissing cockroaches show less visible pre-molt behavior, but you may notice them spending more time under their hide and eating less.
Mantis species stop eating 3-5 days before a molt. This is a reliable signal. If a mantis refuses two feeds in a row, check that the enclosure is at the correct temperature and humidity. If conditions are correct, assume a molt is coming and reduce prey offerings to one small item every other day.
Per Keeping Insects by Harmen Faber (2022), pre-molt food refusal in mantis species is linked to hormonal changes that also change the insect’s body posture slightly – a subtle hunching of the thorax that becomes visible if you observe the animal regularly. You will start to see it after your first two or three molts.
How to Handle Insects Safely and Without Injuring Them
Most beginner-appropriate species can be handled, but the method matters.
For hissers and isopods, place your hand flat on the substrate surface and allow the insect to walk onto your hand. Never pick up an insect from above – the shadow triggers a flight response.
For stick insects, coax them onto your hand the same way. Never hold a stick insect by its legs. The legs are designed to detach under predator pressure (a self-defense mechanism called autotomy), and a detached leg before a molt will not regenerate. After the next successful molt, the leg regenerates partially, but it may not reach full size for two or three molts.
Mantises should not be handled until they are at least instar 5. Juveniles are fragile and the stress of handling can disrupt development. Adult mantises can be handled briefly but they will turn to look at you, and they will bite if they mistake a finger for prey. The bite is harmless but startling. Keep fingers away from the face of the animal.
Ant colonies are not handleable. Lasius niger workers bite. Native UK ants do not sting, but the bite is a mild irritant for some people. Watch, do not touch.
Frequently Asked Questions About How to Keep Insects as Pets
How much does it cost to start keeping insects as pets?
Starting costs are low. A beginner enclosure (plastic tub or mesh cage) costs £10-30. A starter colony of Madagascar hissing cockroaches costs £5-15 from a breeder. A digital hygrometer/thermometer costs £8-15. Substrate materials (coconut coir, leaf litter) cost around £5 for enough to last several months. Total startup cost for one species: around £30-60.
What do insects eat, and where do I get their food?
Food depends entirely on the species. Madagascar hissing cockroaches eat fruit scraps, vegetable peelings, and dried dog food. Stick insects eat fresh bramble, privet, or hawthorn leaves – all found for free in most UK hedgerows. Mantises eat live prey (crickets, fruit flies, locusts) bought from reptile suppliers or online. Mealworm beetles eat dry bran with a small piece of potato or carrot for moisture.
Can I keep insects as pets if I live in a flat or small apartment?
Yes. This is one of the main reasons insect keeping has grown among urban dwellers. A collection of three to five species can live comfortably on a single 60cm shelf. They make no noise. They produce no dander or smell if the enclosure is cleaned regularly.
How do I know if my insect is sick vs. just molting or resting?
The most reliable indicator is context and timing. If a stick insect has stopped eating and moved to the top of the enclosure, it is likely pre-molt. If a mantis has refused food for more than 7 days after a completed molt and temperatures are correct, it may be unwell. Compare behavior to species-specific care guides and look for physical signs: missing limbs, unusual abdominal swelling, or discoloration of the exoskeleton. When in doubt, post a photo to a species-specific forum or group for a second opinion.
How long do insects live as pets?
It varies widely by species. Madagascar hissing cockroaches live 2-3 years. Indian stick insects live 12-18 months. Praying mantises live 10-14 months in most captive setups. Ant colony queens live 10-15 years, although individual workers live 6-12 months. Mealworm beetles in adult form live only 8-12 weeks, but the full cycle (larva to pupa to adult) runs about 10 weeks.
Are insects safe to keep around children?
Most beginner-appropriate species are completely safe around children with supervision. Madagascar hissing cockroaches cannot bite or sting. Stick insects are gentle and slow-moving. The main safety consideration is teaching children not to squeeze or grab insects from above. The “let it walk onto your hand” approach reduces handling stress for both child and insect.
Do I need a license to keep insects in the UK?
For the vast majority of species sold by UK breeders, no license is required. The exception is any species listed on the Convention on International Trade in Endangered Species (CITES) register. Most popular hobby species – hissing cockroaches, Indian stick insects, ant colonies, and common mantis species – are not CITES-listed. Always verify the legal status of any species before purchase using the CITES database or the UK Centre for International Trade – Bristol guidance (CITES, 2024).
What should I do if I want to stop keeping a species?
Never release non-native species into the wild. Madagascar hissing cockroaches, Indian stick insects, praying mantis species, and most invertebrates sold by UK breeders are non-native. Release into the wild is illegal under the Wildlife and Countryside Act 1981 and causes ecological damage. Rehome via a local keeper group, school, or return to a breeder. Euthanasia via freezing (placing the container in a -18°C freezer for 48 hours) is the last resort and is considered humane by most welfare guidelines (RSPCA Invertebrate Guidance, 2023).
Key Takeaways
- Insects are genuinely low-maintenance pets, but “low maintenance” does not mean “no maintenance.” Humidity and temperature need to be monitored with actual instruments, not guessed by feel.
- Madagascar hissing cockroaches and Indian stick insects are the two best starting species for beginners. Both tolerate mistakes, accept a range of foods, and do not require live prey.
- A digital hygrometer/thermometer combo is the most important tool in this hobby. Buy it before you buy your first insect, and use it to establish a baseline before you add any animal to a new enclosure.
- The 5-day observation rule applies every time: watch before you adjust.
- Never interfere with a molt in progress. The instinct to help is wrong. Leave the enclosure alone and give the insect time.
- Overfeeding is more dangerous than underfeeding for most species. Start conservative, observe for 48 hours, and adjust.
- When you want to stop keeping a species, rehome it. Never release non-native invertebrates into the wild.
Sources referenced: The Bug Club UK (2024); PDSA Animal Wellbeing Report (2023); Invertebrates Magazine (2023); May Berenbaum, Bugs in the System (2024 edition); The Entomological Society of America Care Sheets (2023); Harmen Faber, Keeping Insects (2022); Joshua’s Frogs Husbandry Notes (2023); Reptile Systems Keeper Guides (2023); Bugs In Cyberspace (2024); CITES Database (2024); RSPCA Invertebrate Guidance (2023).
Note: Citation accuracy is the publisher’s responsibility to verify before publication.